PrometheusとGrafanaでSolrの状態を可視化する

はじめに
Solr のリファレンスを見ると、Solr のモニタリングのために様々な手段が用意されていることがわかります。今回はその中で、Prometheus と Grafana を使った Solr ステータスの可視化を試してみました。
Prometheus のインストールと起動
ダウンロード
$ wget https://github.com/prometheus/prometheus/releases/download/v2.21.0/prometheus-2.21.0.linux-amd64.tar.gz
$ tar zxf prometheus-2.21.0.linux-amd64.tar.gz
$ cd prometheus-2.21.0.linux-amd64
設定
prometheus.yml に以下を追加
scrape_configs:
  - job_name: 'solr'
    static_configs:
      - targets: ['localhost:9854']
起動
./prometheus --config.file=prometheus.yml
prometheus-exporter の起動
prometheus-exporter は Solr と Prometheus との間に入って Solr のモニタリングデータをやり取りするためのプログラムです。ここでは Solr はすでに稼働中である前提です。
$ cd contrib/prometheus-exporter
$ ./bin/solr-exporter -p 9854 -b http://localhost:8983/solr -f ./conf/solr-exporter-config.xml -n 8
リファレンスではスタンドアロンモードの場合の起動方法と SolrCloud モードの場合の起動方法が紹介されていて、上記はスタンドアローンの場合です。SolrCloud でも内蔵の ZooKeeper を使っている場合はスタンドアローンの場合の起動方法を使わないとうまくいきませんでした。
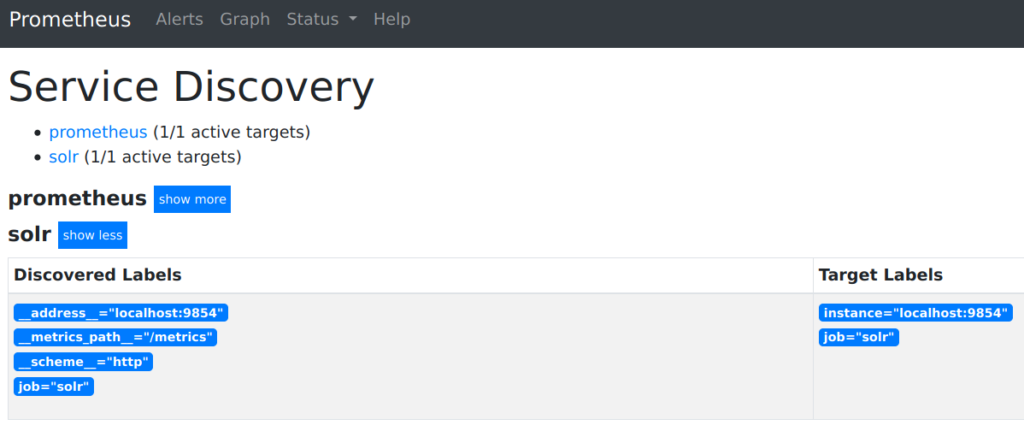
prometheus 上での動作確認
http://localhost:9090/ にアクセスして
Status → Service Discovery で solr がリストに含まれていればOK。
Grafana のインストールと起動
$ wget https://dl.grafana.com/oss/release/grafana-7.2.0.linux-amd64.tar.gz
$ cd grafana-7.2.0
$ bin/grafana-server web
Grafana でダッシュボード作成
- http://localhost:3000/ にアクセスして admin:admin でログイン
- Data Source を追加
- Configuration → Data Sources
- Add data source で Prometheus を選択
- Settings のタブで URL に http://localhost:9090/ を入力して Save & Test を実行
- ダッシュボードの設定をインポート
- Dashboards → Manage で Manage 画面を開いて Import ボタンを押す
- Upload JSON file ボタンを押して contrib/prometheus-exporter/conf/grafana-solr-dashboard.json をアップロード
- Options 画面でダッシュボード名と Data Source を指定してインポート
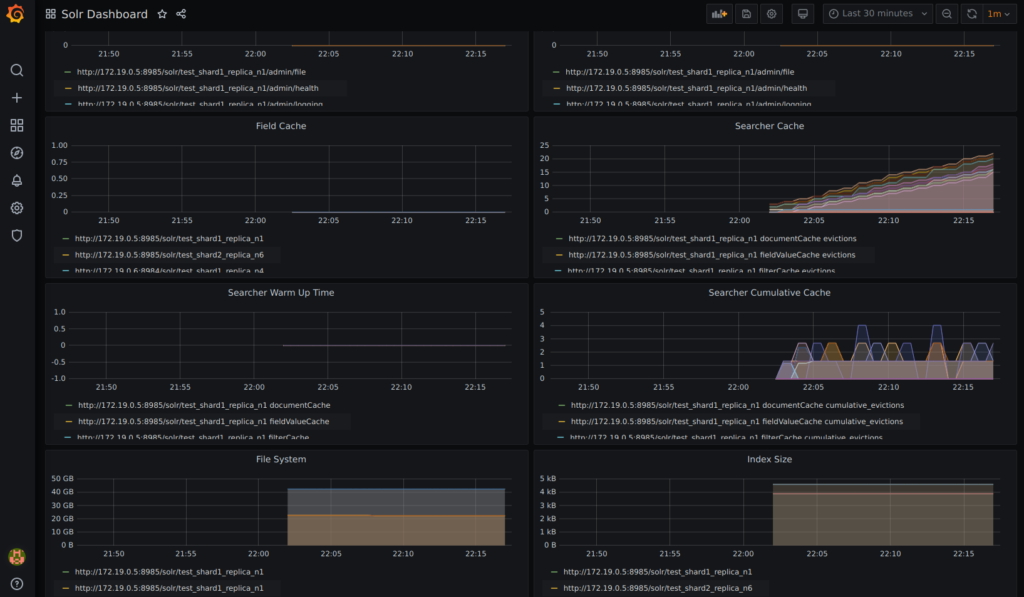
うまくいけば以下のようなダッシュボードに各種のグラフが表示されるようになります。